स्टोरएसईओ आपके लिए एक ऑटो इमेज ऑप्टिमाइज़ेशन सुविधा लेकर आया है छवि अनुकूलक ऐड-ऑन। अब आपको अपने उत्पाद चित्रों को मैन्युअल रूप से अनुकूलित करने की आवश्यकता नहीं है; एक बार सक्षम होने के बाद, यह सुविधा आपके Shopify स्टोर पर अपलोड करते समय आपके चित्रों को स्वचालित रूप से अनुकूलित और आकार बदलने में आपकी सहायता करेगी।
अपने स्टोर के लिए ऑटो इमेज ऑप्टिमाइज़ेशन सुविधा सक्षम करने के लिए इस चरण-दर-चरण मार्गदर्शिका का पालन करें।
टिप्पणी: ऑटो इमेज ऑप्टिमाइज़ेशन सुविधा केवल प्रीमियम इमेज ऑप्टिमाइज़र सदस्यता योजनाओं पर उपलब्ध है। नीचे दिए गए दिशा-निर्देशों पर जाने से पहले, आपको निम्न करके अपनी सदस्यता योजना में इमेज ऑप्टिमाइज़र ऐड-ऑन जोड़ना होगा यह दस्तावेज़.
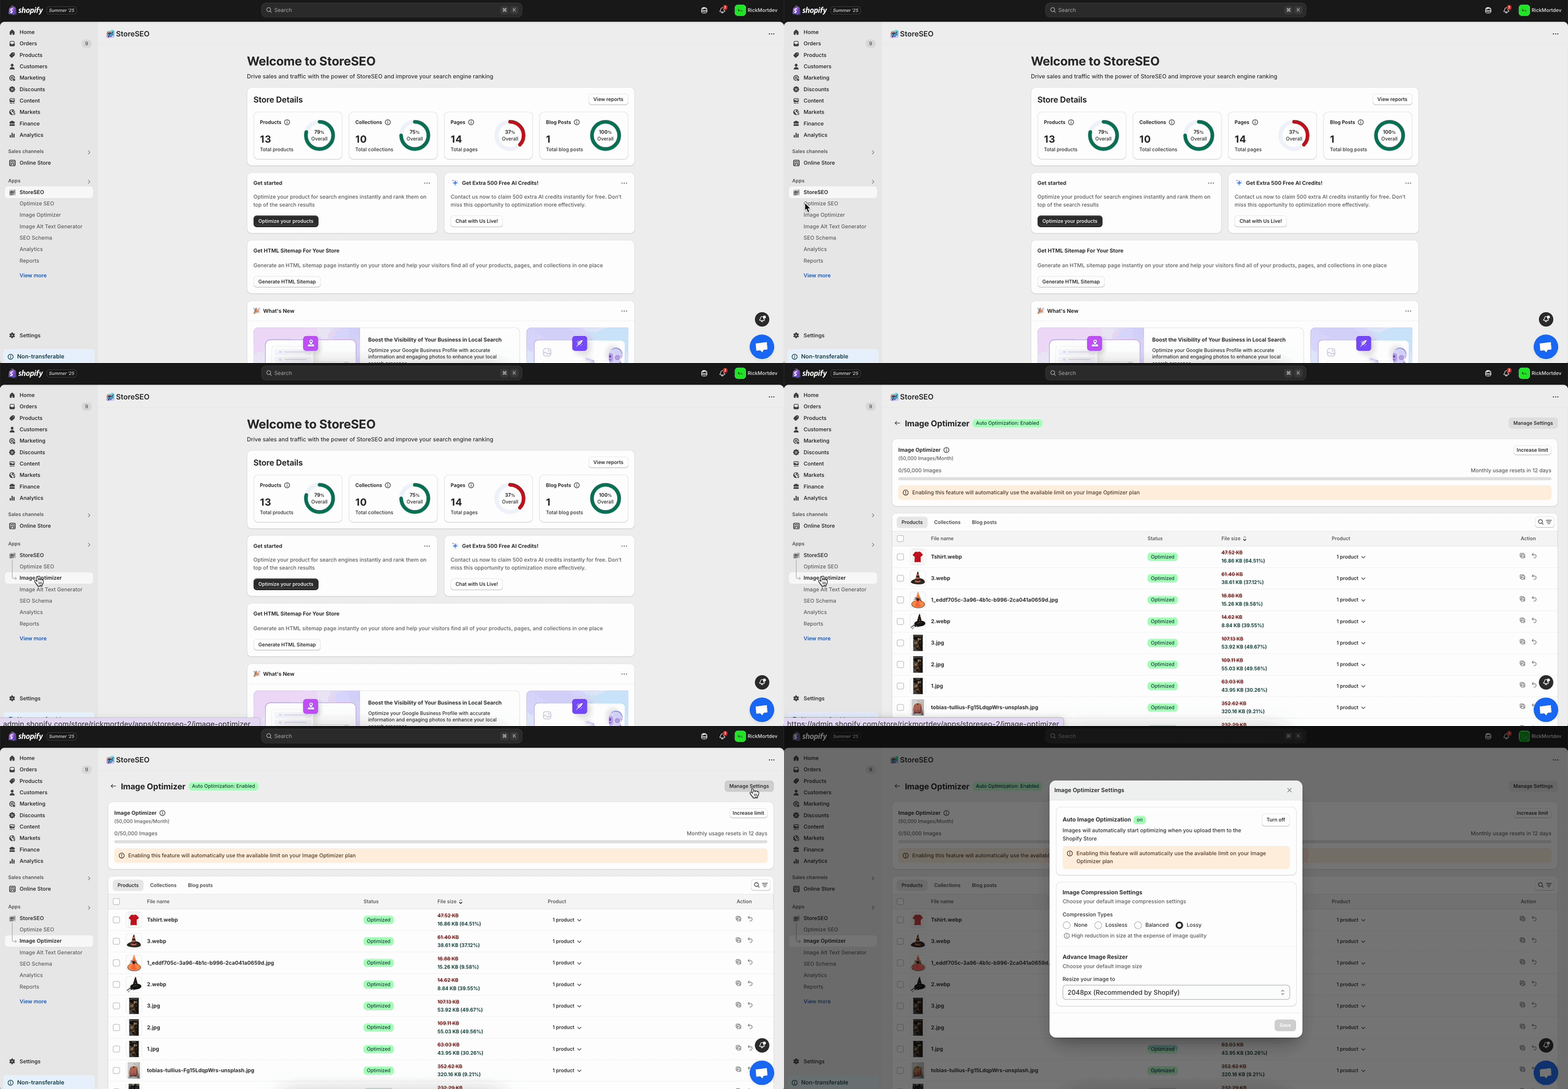
चरण 1: ऑटो इमेज ऑप्टिमाइज़ेशन सेटिंग्स पर जाएँ #
स्टोरएसईओ ऐप डैशबोर्ड से, 'छवि अनुकूलक' → 'सेटिंग्स प्रबंधित करें' विकल्प।

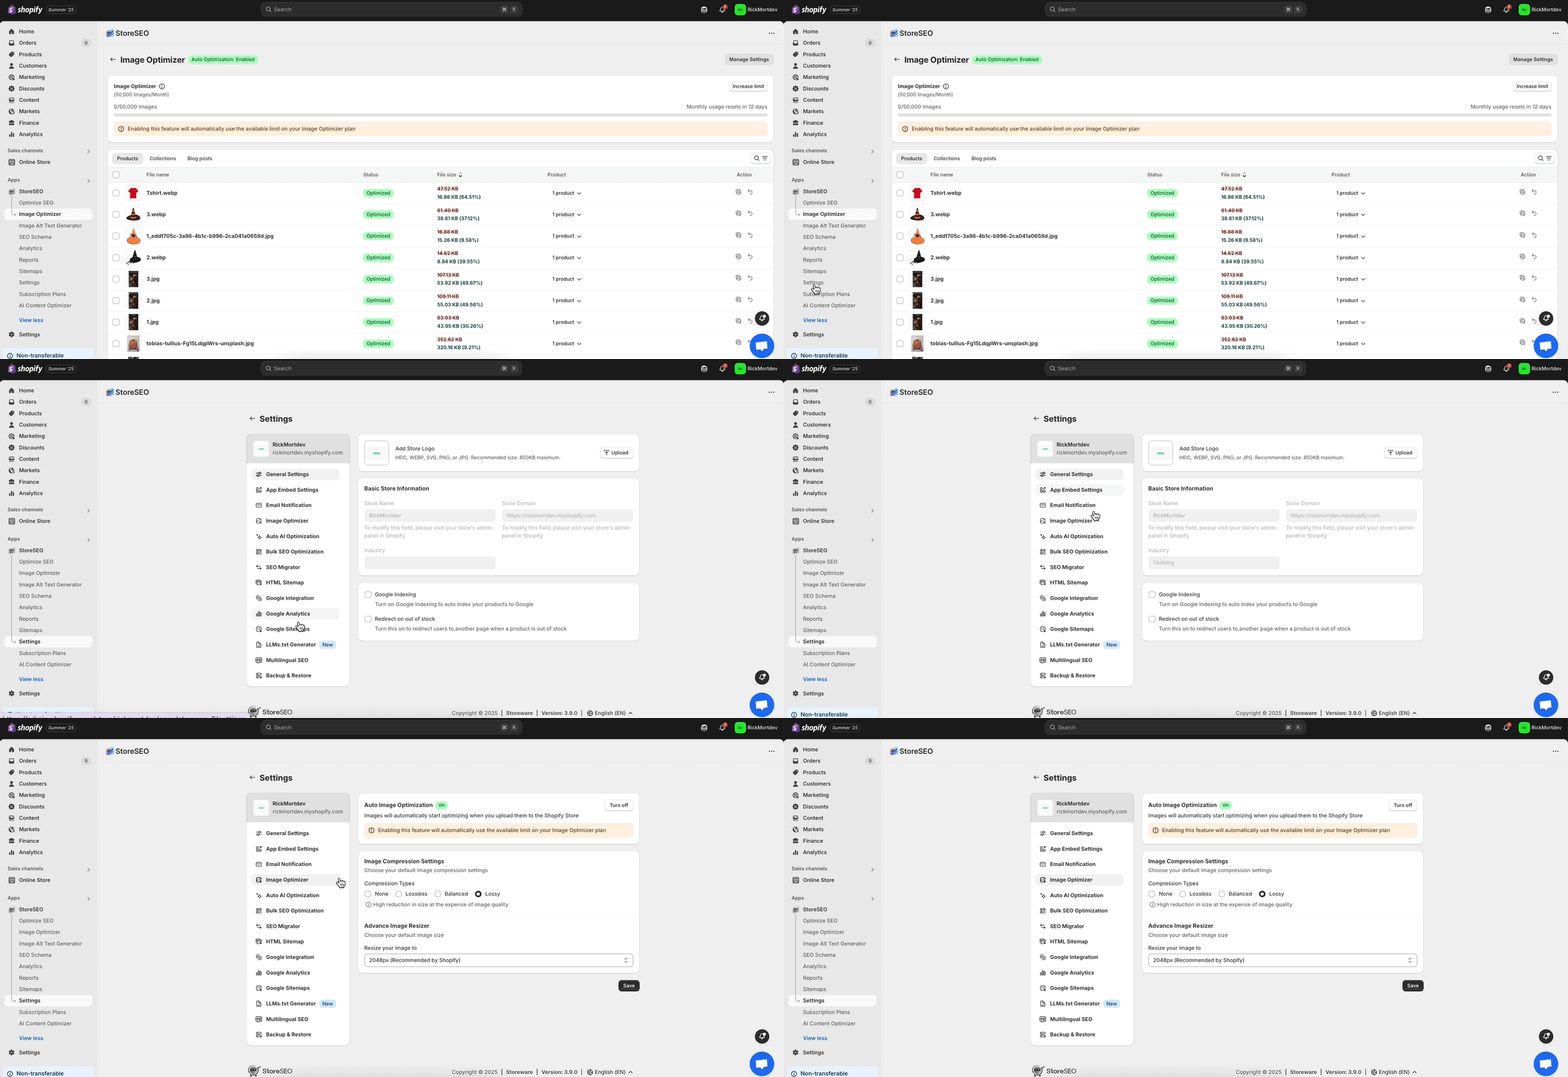
वैकल्पिक रूप से, आप 'सेटिंग्सअपने स्टोरएसईओ डैशबोर्ड से ' टैब खोलें और ' पर जाएँछवि अनुकूलक' विकल्प।

चरण 2: अपने स्टोर पर ऑटो इमेज ऑप्टिमाइज़ेशन सक्षम करें #
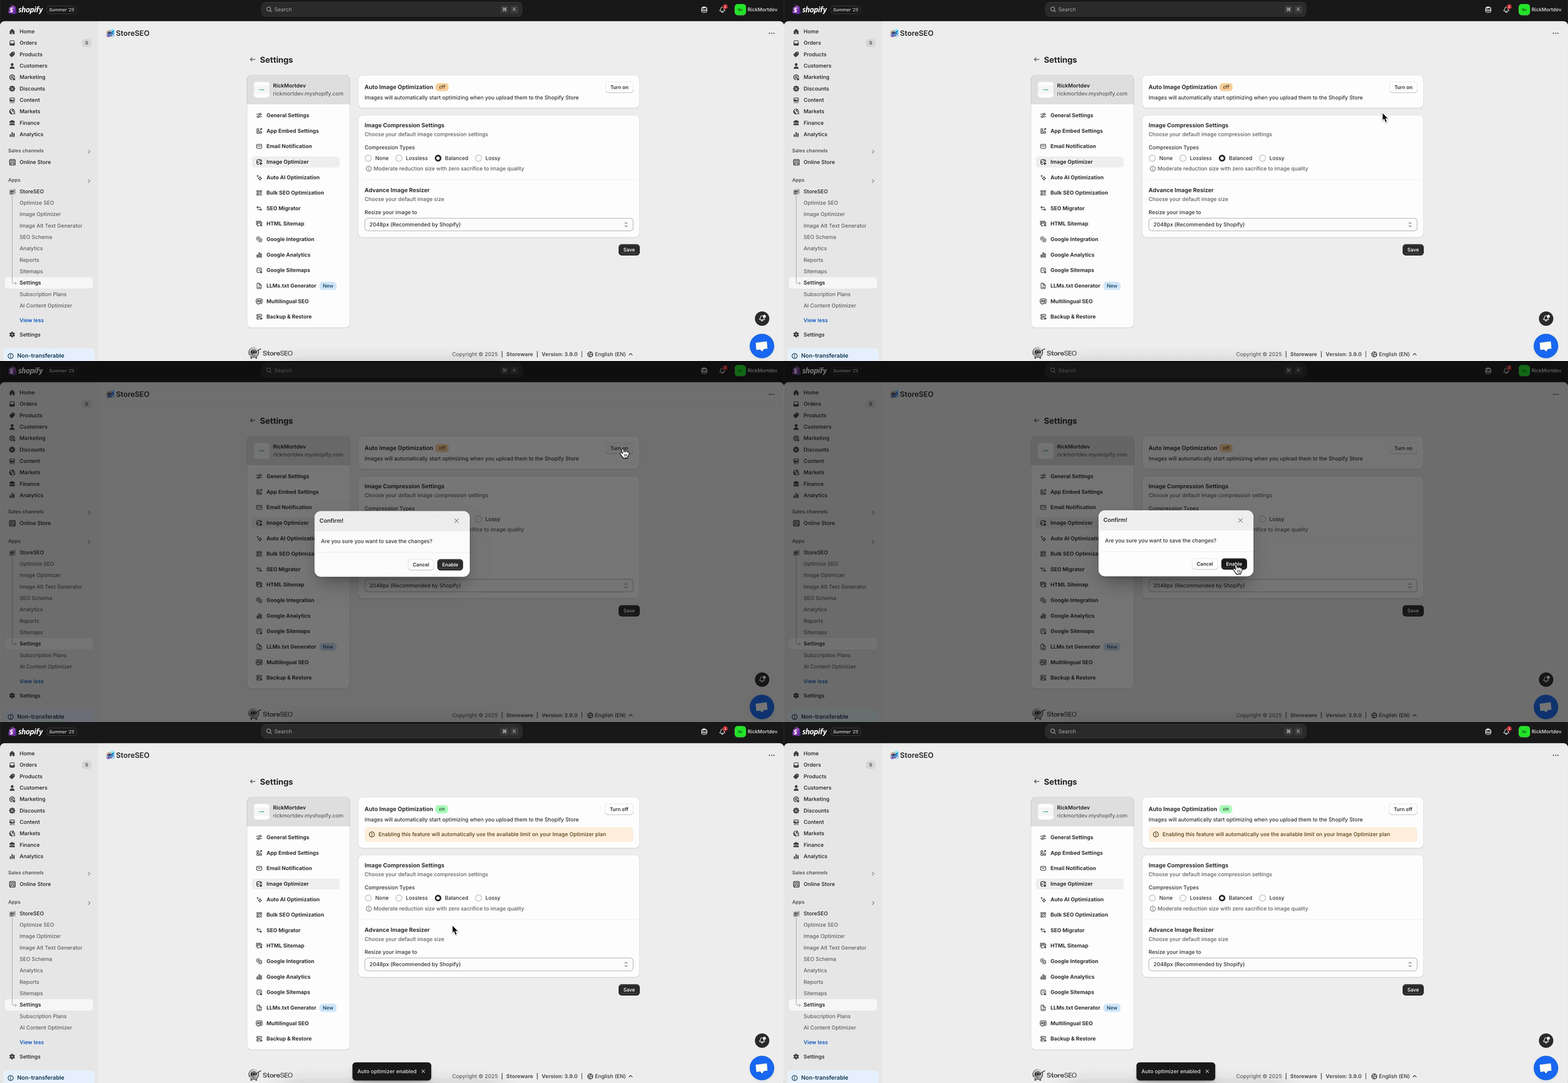
इमेज कम्प्रेशन, इमेज फॉर्मेट और इमेज रिसाइज़र के लिए अपनी इच्छानुसार डिफ़ॉल्ट सेटिंग चुनें। इसके बाद, 'बचाना' बटन।

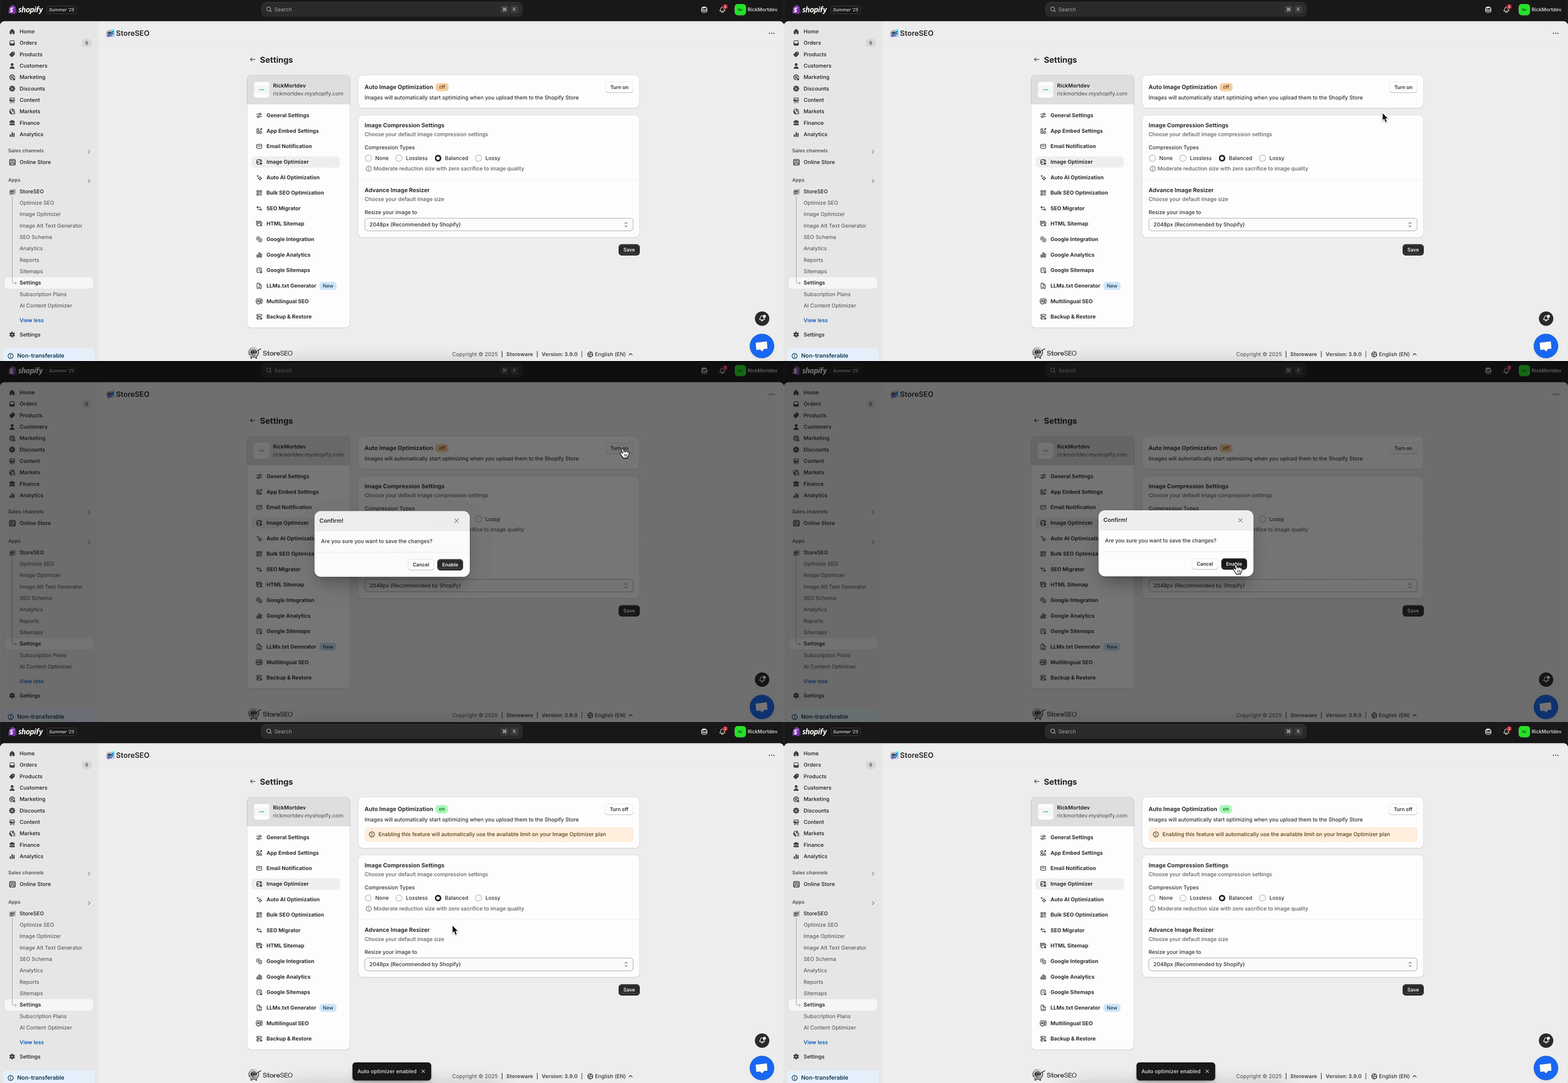
अब, 'पर क्लिक करेंचालू करो' बटन को ' से 'ऑटो छवि अनुकूलन' अनुभाग पर क्लिक करें। यह आपके स्टोर के लिए ऑटो इमेज ऑप्टिमाइजेशन को तुरंत सक्षम कर देगा।
टिप्पणी: StoreSEO के साथ एक छवि को अनुकूलित करने के बाद, यदि आप इस छवि को प्रतिस्थापित करते हैं और फिर इसे पुनर्स्थापित करते हैं, तो StoreSEO आपके द्वारा अनुकूलित पहले से प्रतिस्थापित छवि को पुनर्स्थापित कर देगा और आपकी नई जोड़ी गई छवि आपके Shopify स्टोर से हटा दी जाएगी।

इस प्रकार आप आसानी से Shopify स्टोर्स पर ऑटो इमेज ऑप्टिमाइज़ेशन सक्षम कर सकते हैं।
सहायता की आवश्यकता है? बेझिझक हमसे संपर्क करें समर्पित सहायता टीम किसी भी प्रकार के प्रश्न के लिए.


