Shopify SEOを理解することは、eコマースビジネスのオーナーにとって非常に難しいことです。特に、技術的なSEOと Shopifyのサイトマップを追加する これらの用語に慣れていない場合、非常に混乱する可能性があります。
あなたを助けるために、私たちはこの完全なガイドを用意しました。このガイドでは、Shopify のサイトマップについて知っておくべきことすべてと、それがオンライン ストアの検索ランキングにどのように影響するかを学べます。
Shopify サイトマップを理解する: 初心者向けチュートリアル
まず、基本的なことを説明します。 Shopify サイトマップ 初心者が知っておくべきことを調べてみましょう。サイトマップとは何か、なぜそれほど重要なのか、そして知っておくべきサイトマップの種類について、以下で詳しく学んでください。
サイトマップとは何ですか?なぜ SEO にとって重要なのですか?
家や建物に各部屋の位置を示す設計図があるのと同じように、ウェブサイトのサイトマップも同様に機能します。この場合、サイトマップは Shopify ストアの設計図となります。
これがSEOに役立つ理由は、Googleなどの検索エンジンがあなたのウェブサイトにあるすべてのコンテンツを見つけ、クロールし、インデックスするのに役立つからです。 Shopifyビジネスつまり、Shopify サイトマップがあれば、検索エンジンが商品やサービスをより簡単に見つけてインデックス付けできるため、潜在的な顧客があなたのストアをより簡単に見つけられるようになります。
通常、サイトマップには主に 2 つの種類があります。 HTML サイトマップと XML サイトマップ.
HTML サイトマップとは何ですか?
HTML サイトマップ 主にウェブサイト訪問者を誘導して さまざまなページやコンテンツを探索する ウェブサイトに。このタイプのサイトマップは、ウェブサイトをユーザーフレンドリーにして、サイト訪問者がコンテンツ内を移動できるようにすることに重点を置いています。
XML サイトマップとは何ですか?
XML サイトマップ 支援することに重点を置いています 検索エンジンクローラー ページ上の各コンテンツの URL をすべて見つけて適切にインデックス化し、検索結果ページで特定の検索クエリに対してコンテンツがより目立つようにします。これにより、Google などの検索エンジンが Web サイトの構造を理解し、潜在的な顧客にとって関連性の高いコンテンツをより迅速に提供できるようになります。
Shopify のサイトマップはどのように機能しますか?
サイトマップとその2つの主なタイプについての基本がわかったので、次はサイトマップの活用方法を見ていきましょう。 Shopifyのサイトマップ 作業。Shopify サイトマップを管理する方法と、それがオンライン ストアにどのように役立つかについて説明します。
通常、オンラインビジネスが大きくなればなるほど、 Shopify ストアの XML サイトマップ検索エンジンのクローラーが重要な情報をすべて見つけて、SEO 用にインデックス付けすることが容易になります。
Shopifyは XMLサイトマップを自動的に生成する あなたのオンラインストアのXMLサイトマップには、eコマースウェブサイトにあるすべてのメディアファイル、ページ、投稿、その他のコンテンツへのリンクが含まれています。ブラウザにウェブサイトのURLを入力し、 「/サイトマップ.xml」 最後に。
これをブラウザに入力すると、 Shopifyのサイトマップこれは、Shopify ストアの典型的なサイトマップの外観です。1 つの親サイトマップが、製品、メディア ファイル、ブログ投稿、およびページ用の他のいくつかの追加サイトマップ (子サイトマップとも呼ばれます) にリンクしています。
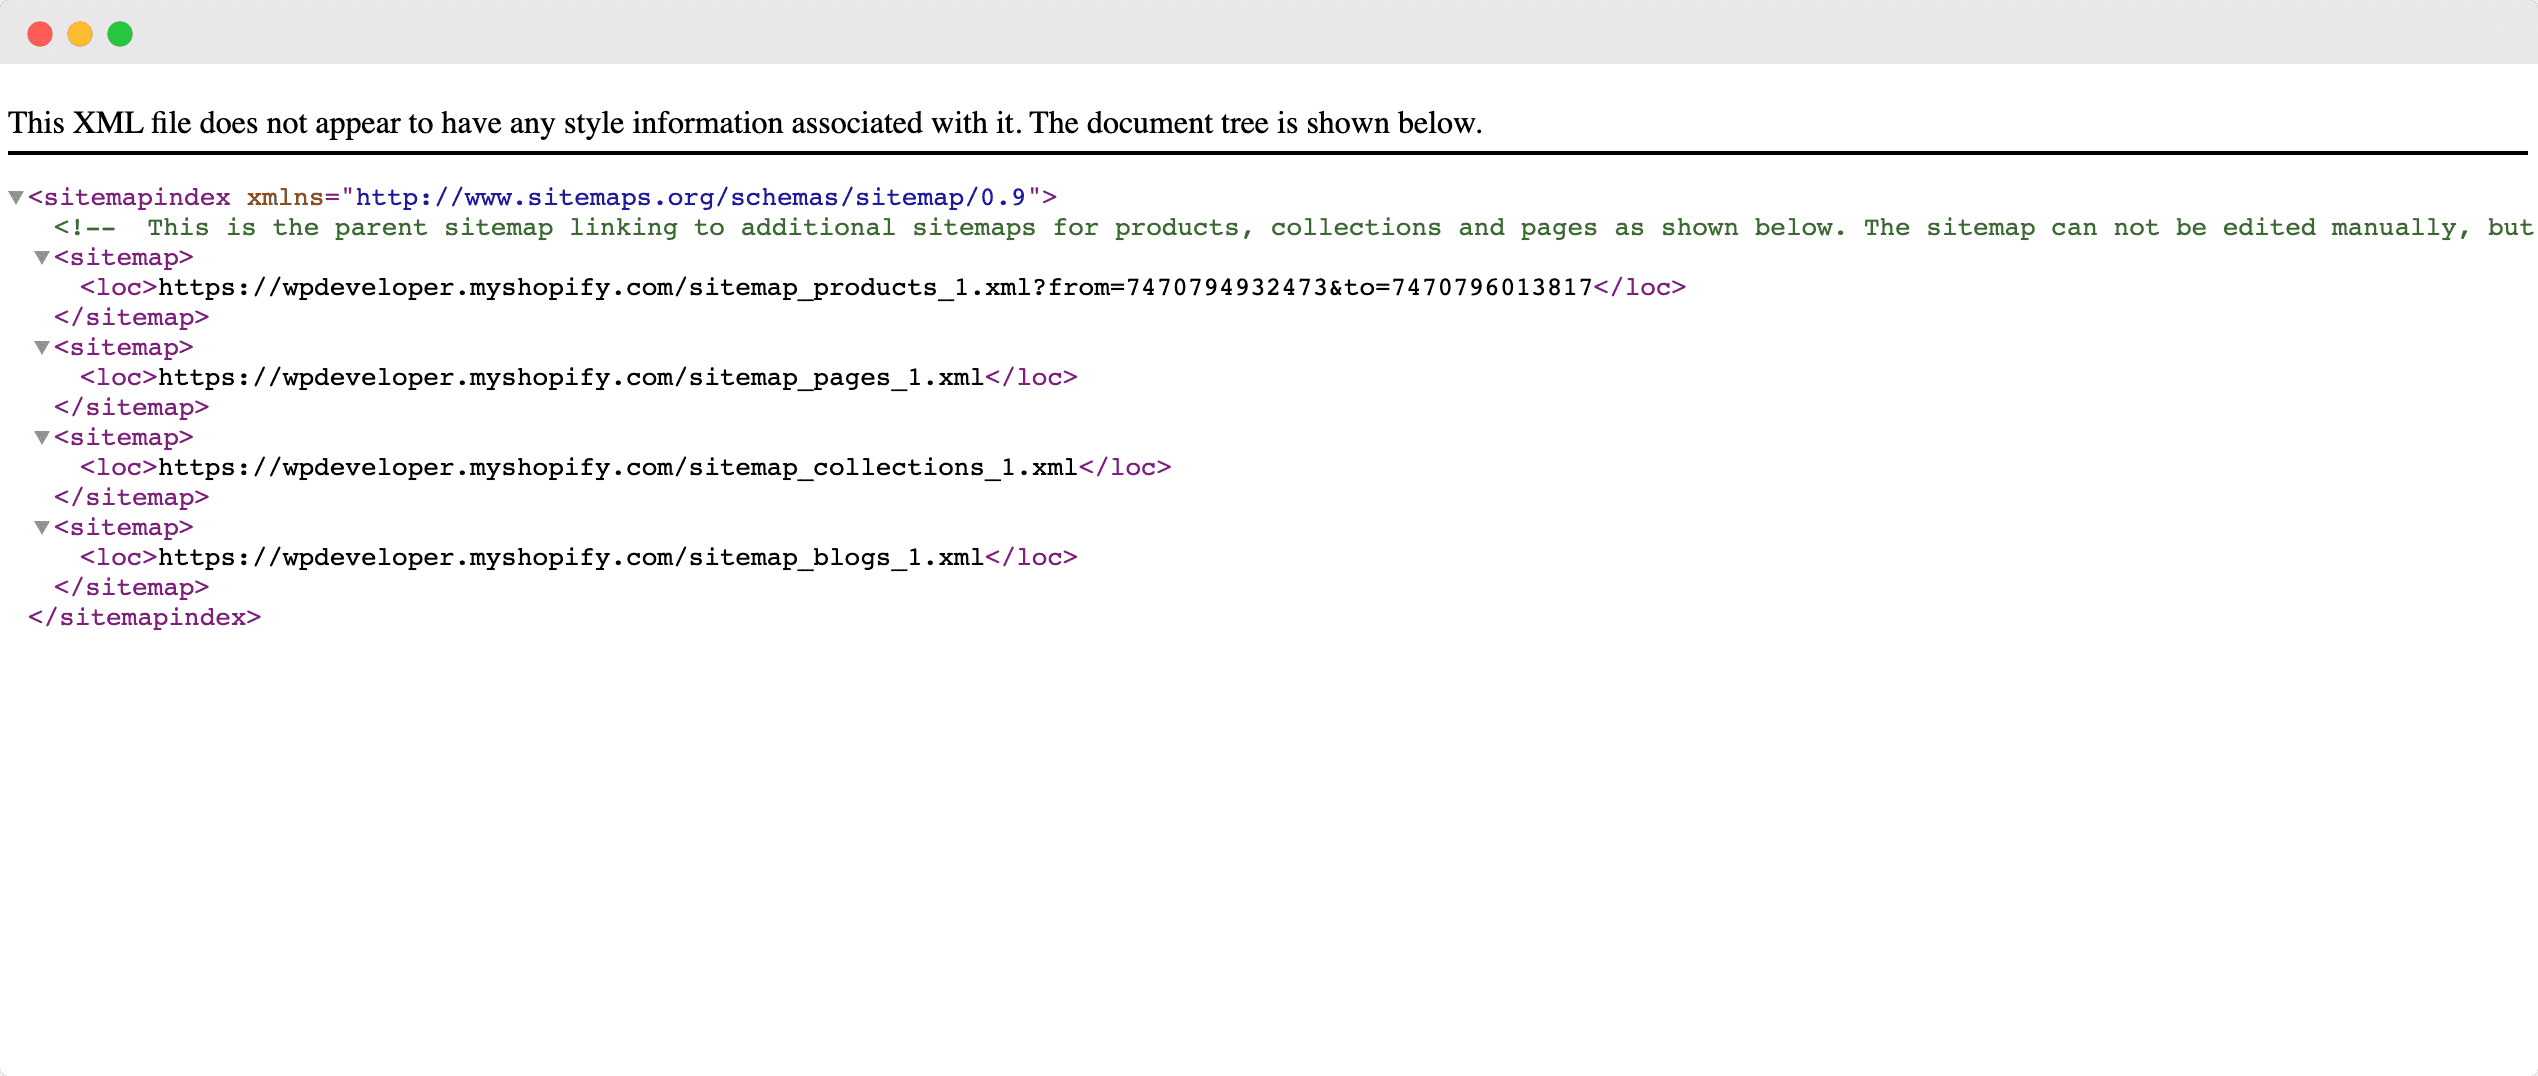
このような組織化された 分類検索エンジンのクローラーは、潜在的な顧客がコンテンツや製品に関連する検索クエリを入力したときに、関連するコンテンツをすばやく見つけて適切な情報を取得できます。これらのサイトマップには、Web サイトのコンテンツが最後に更新された日時に関する情報も含まれており、検索エンジンは検索結果ページで Web サイトのランク付けを行う際にこれを考慮します。
自動生成されたこれらの唯一の問題は Shopifyのサイトマップ 欠点は、自分で編集できないことです。手動で編集したい場合は、コーディングと Shopify API に精通している必要があります。
ありがたいことに、 高度なShopify SEOソリューション StoreSEO と同様に、Shopify ストアのサイトマップの管理はこれまで以上に簡単になりました。StoreSEO を使用すると、Shopify サイトマップに特定の商品を含めるか除外するかを選択できます。これにより、検索エンジンにインデックスさせるものをより細かく制御できます。
StoreSEO を使用して Shopify のサイトマップを管理する方法は?
Shopifyサイトマップの管理 StoreSEO を使えば簡単です。このセクションでは、ステップ バイ ステップのプロセスを説明し、StoreSEO の助けを借りてコーディングなしで Shopify サイトマップに特定の商品を含めたり除外したりする方法を紹介します。
ステップ1: Shopifyストアを設定する
もちろん、始める前にShopifyでオンラインストアを作成する必要があります。Shopifyストアに覚えやすい名前を付け、ビジネス用のユニークなドメインを取得します。次に、すべての商品を追加し、次の手順に従ってShopifyストアを設定します。 この詳細なガイド.
ステップ2: StoreSEOアプリをインストールする
次に、 このStoreSEOアプリをインストールする ShopifyビジネスにStoreSEOを導入しましょう。これはとても簡単です。Shopify管理ダッシュボードにログインしてShopifyアプリストアで「StoreSEO」を探すだけです。 「アプリ」 タブを以下のようにクリックします。
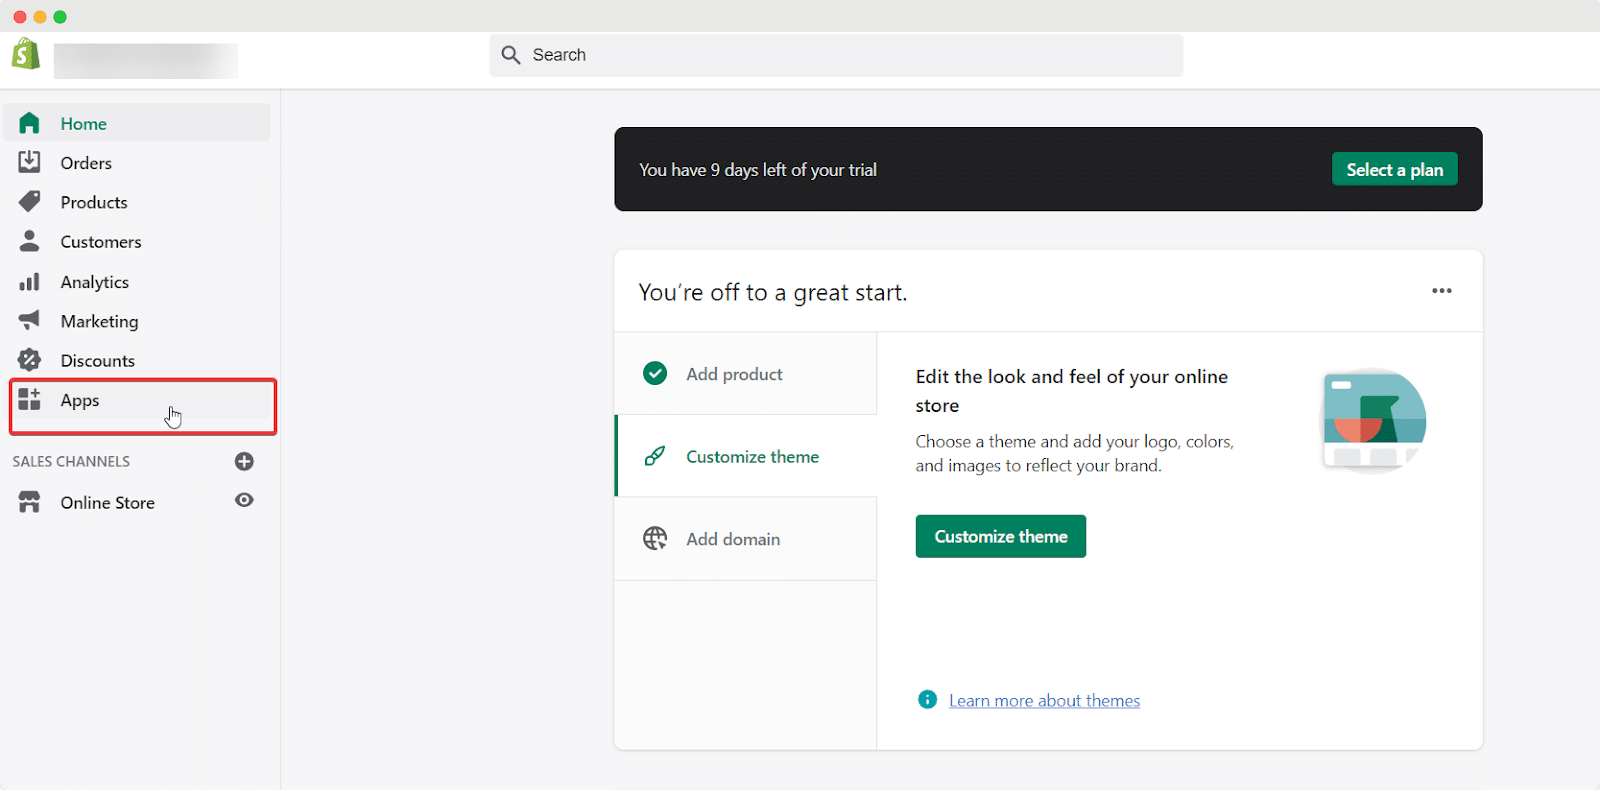
そこからクリックすると 「ストアをカスタマイズ」 ボタンをクリックすると、Shopify アプリ ストアのページにリダイレクトされます。
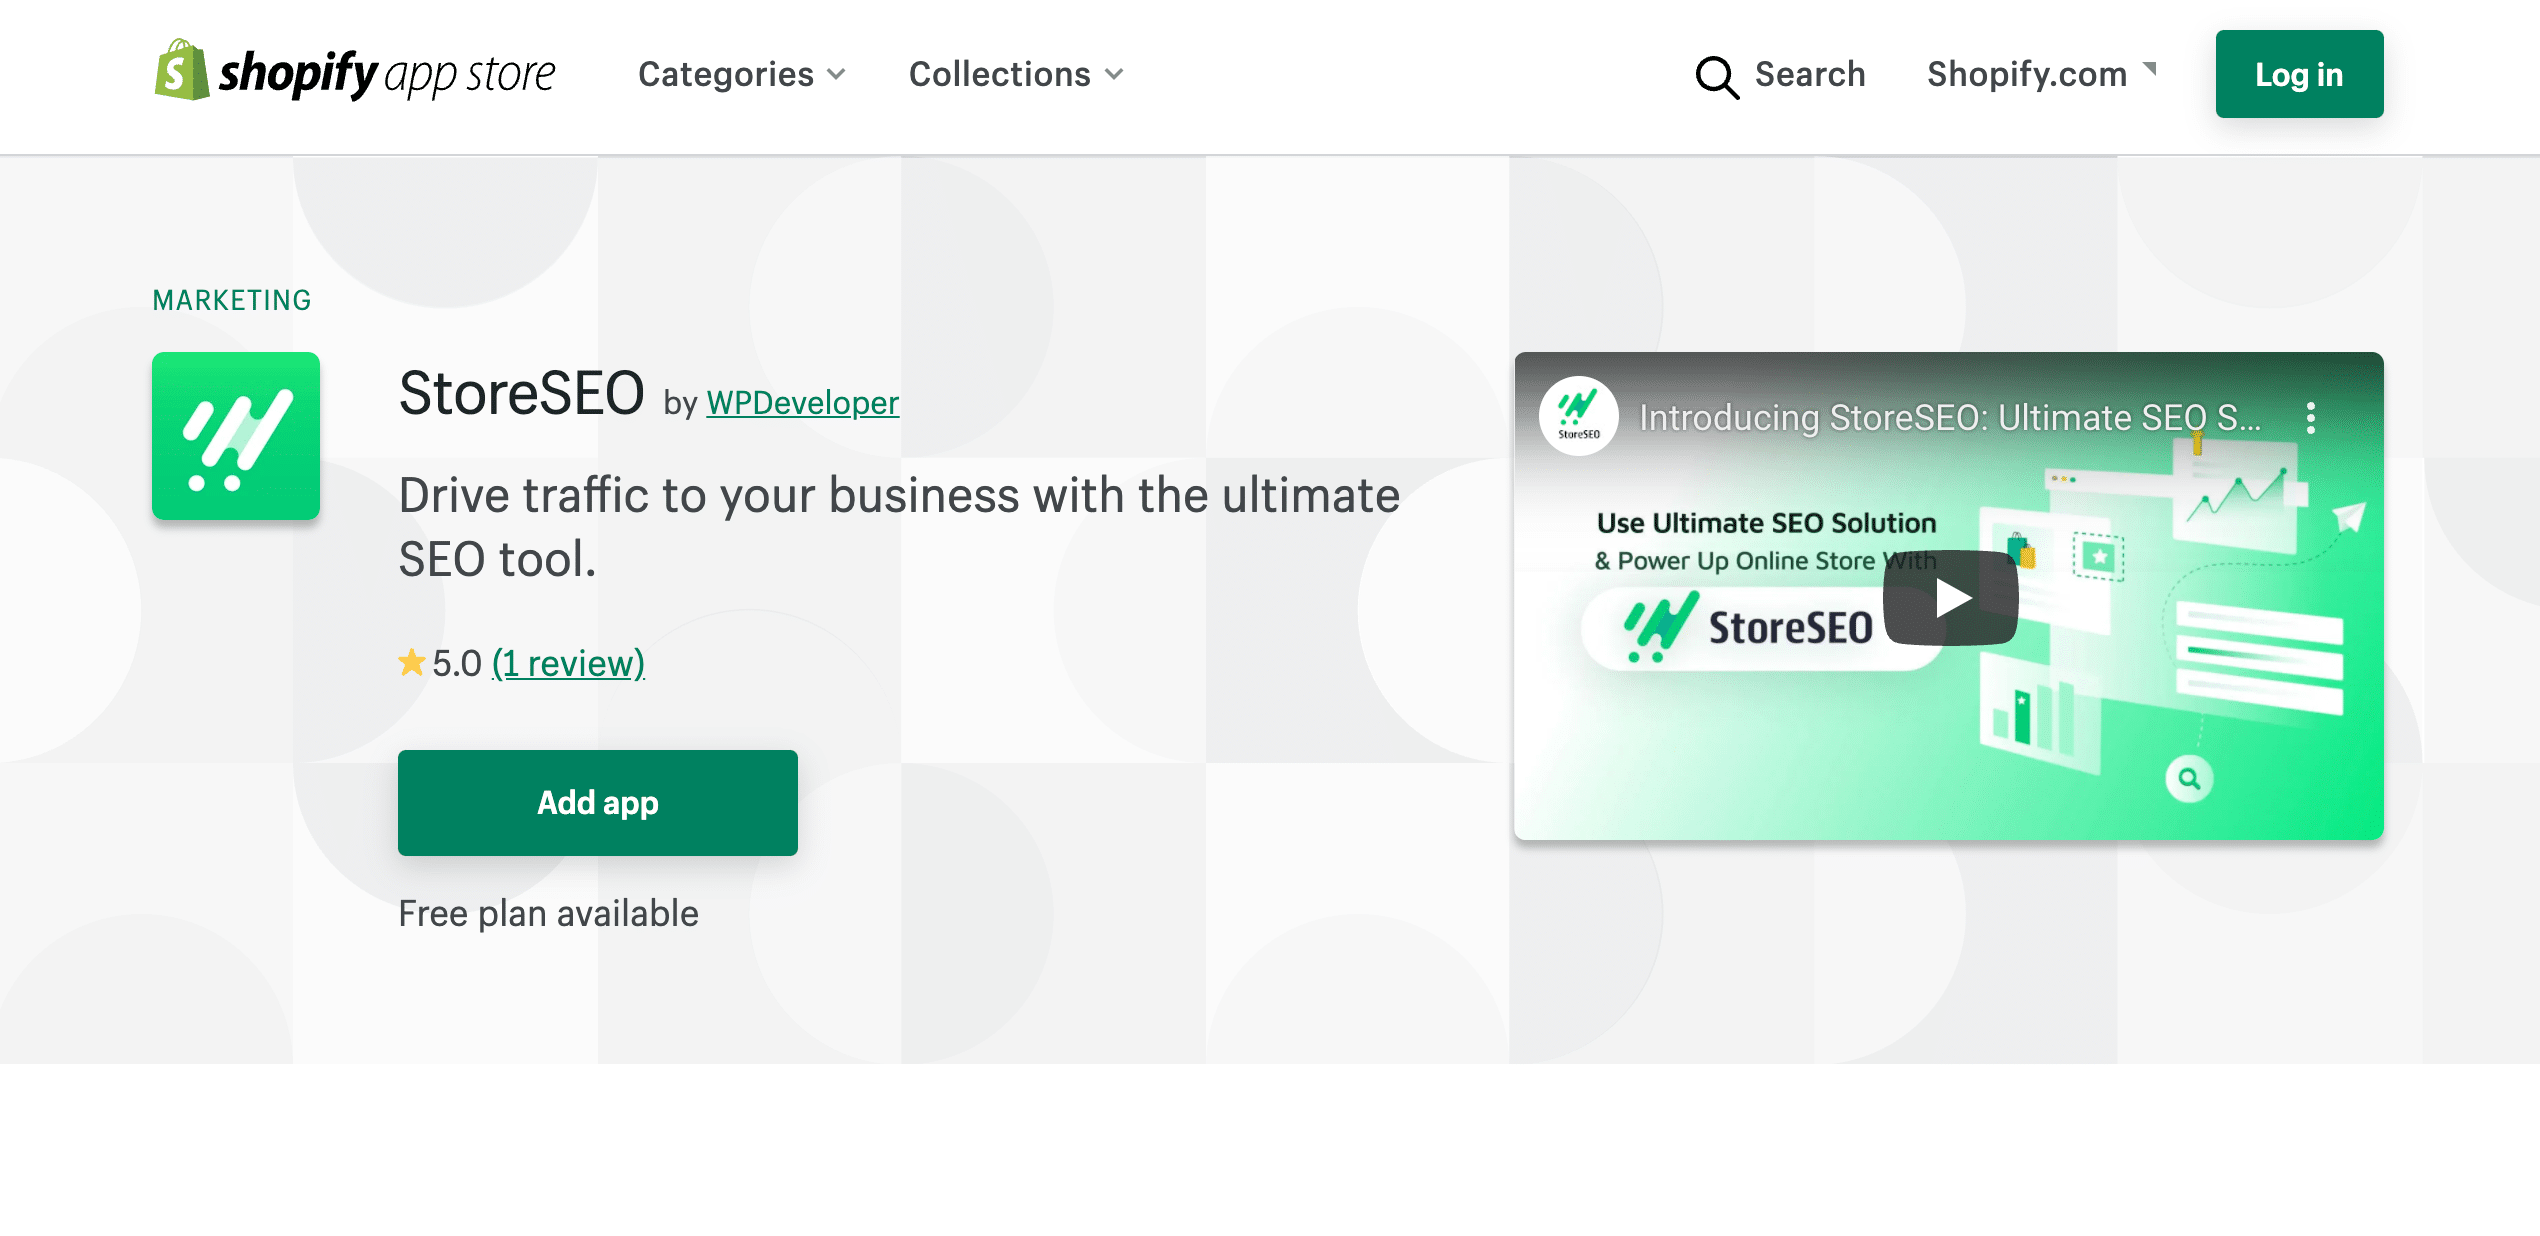
ここで「StoreSEO」を検索し、 アプリを追加「」ボタンをクリックして、Shopify ストアにインストールします。
ステップ3: StoreSEOをGoogle Search Consoleと統合する
StoreSEO をインストールしたら、画面の指示に従って、最適な SEO プラクティスを使用して Shopify ストアと製品を最適化します。これにより、検索結果ページで製品のランクが上がります。
あなたはできる 詳細なガイドをご覧ください ここ StoreSEO が e コマース ビジネスの検索ランキングを向上させるために備えているすべての機能について詳しくご覧ください。
一度 StoreSEOを設定する Shopify ビジネスの場合は、StoreSEO ダッシュボードに移動し、以下に示すように右上隅にある歯車アイコンをクリックします。
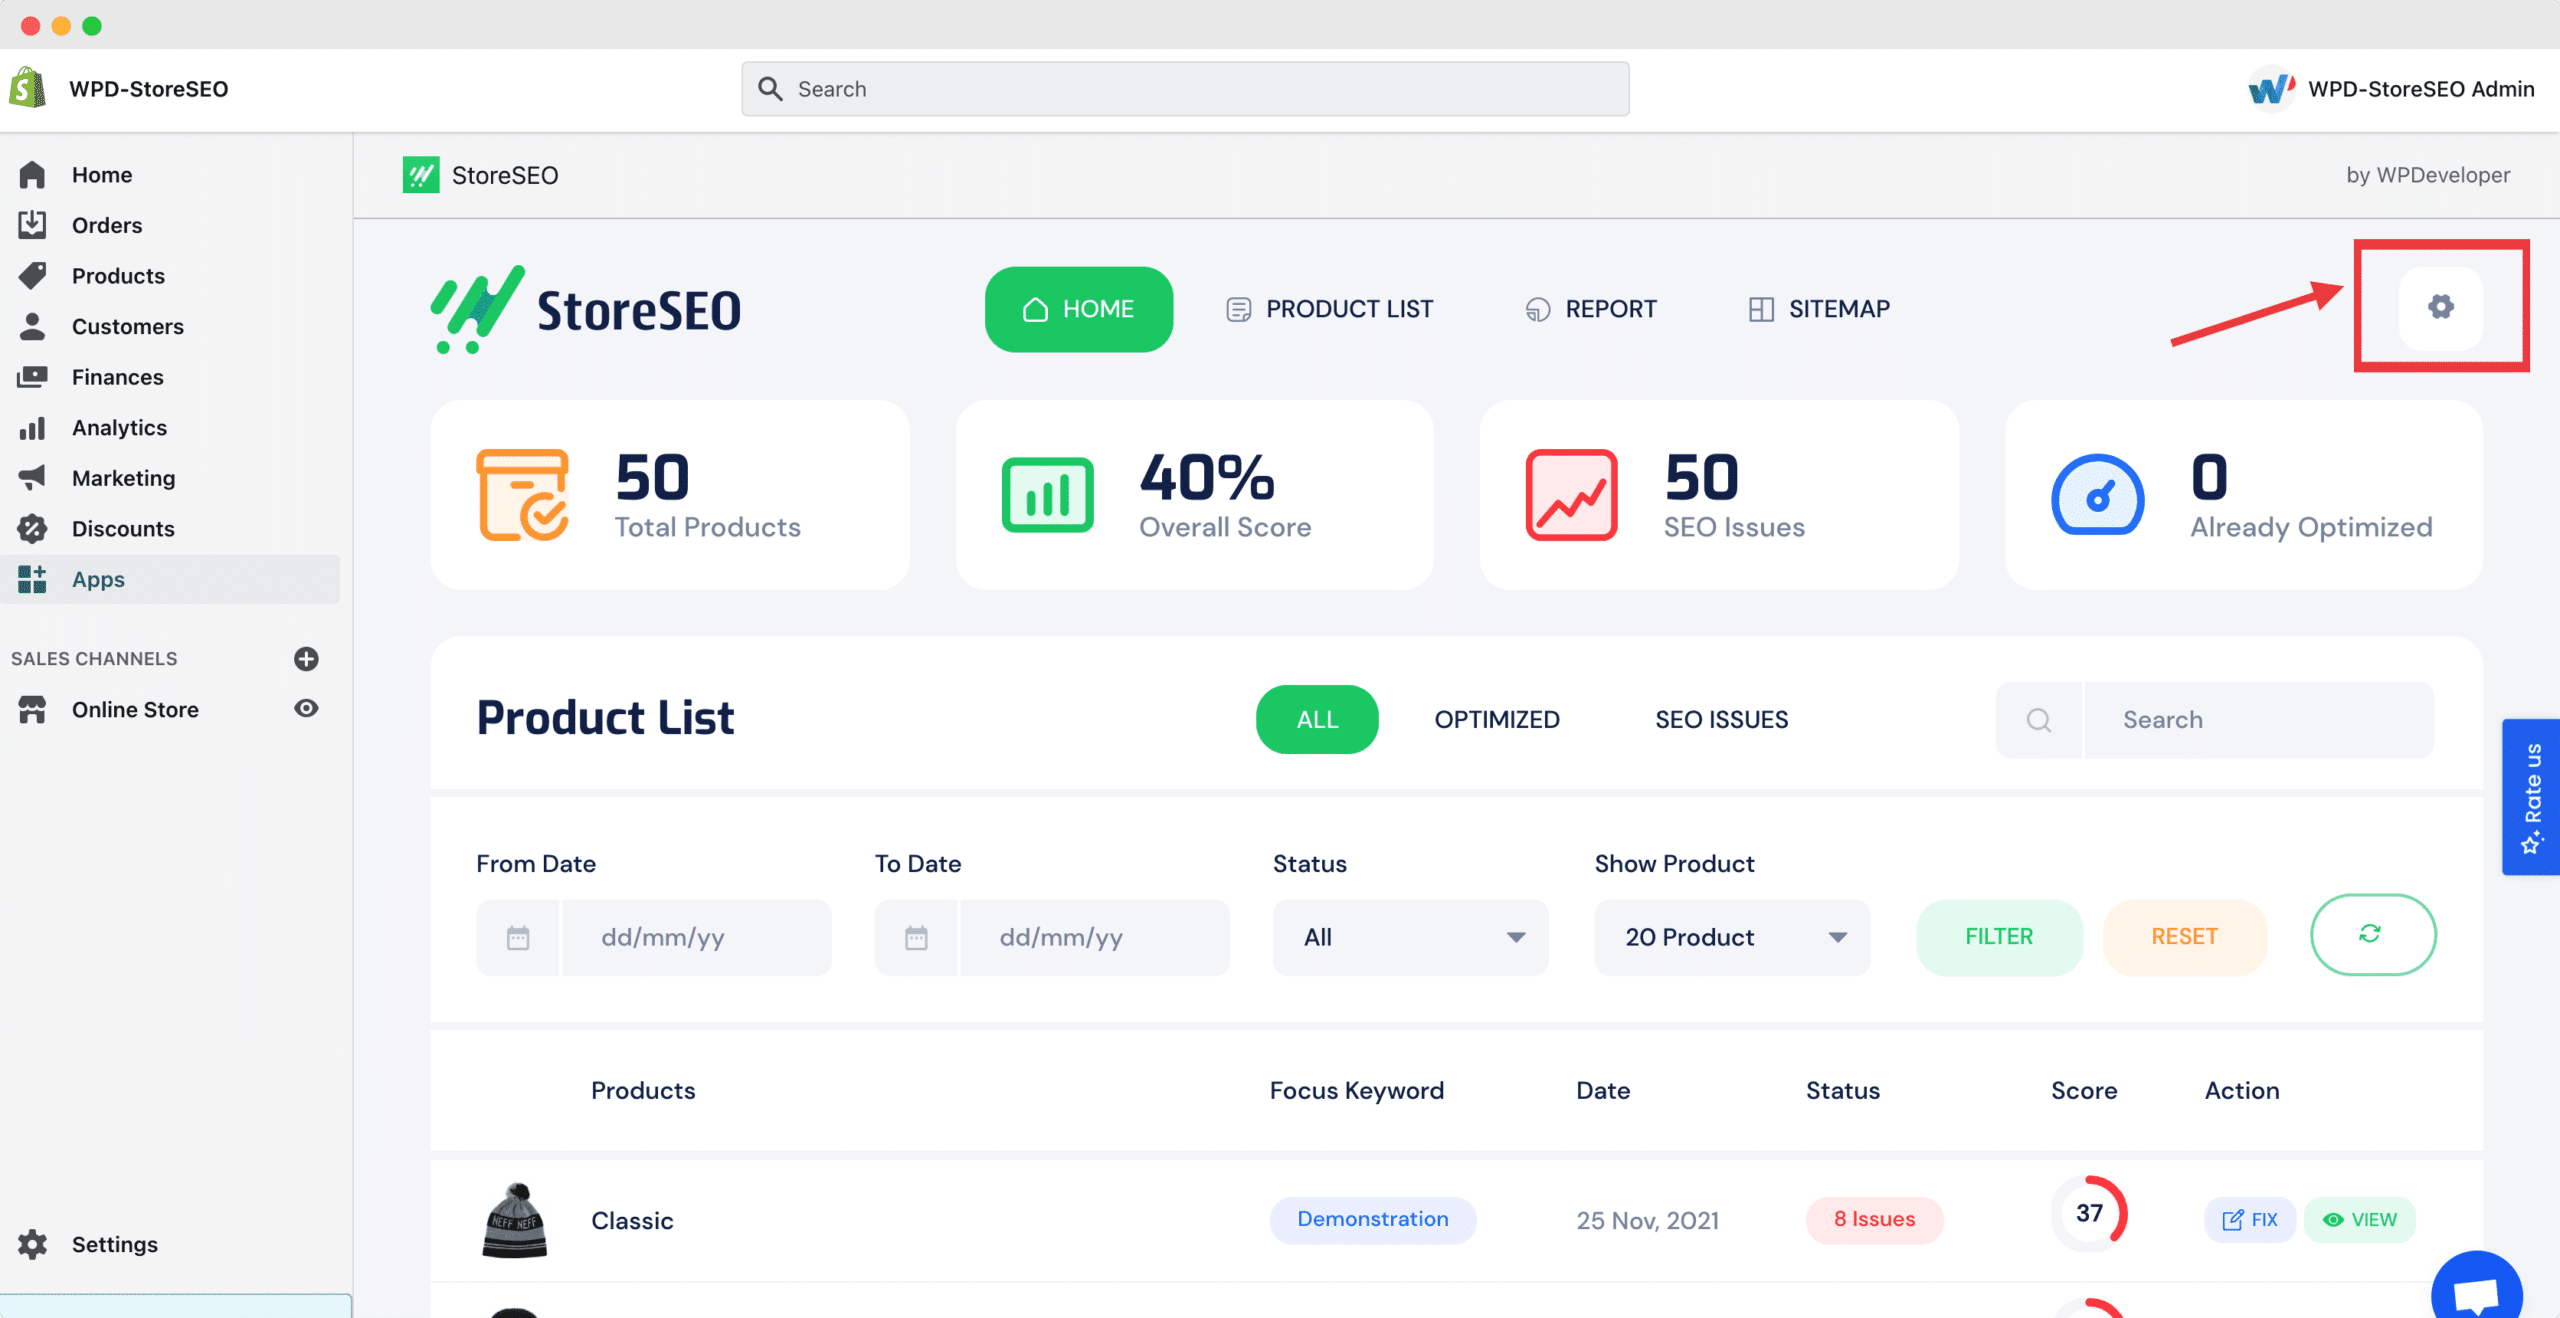
ここから選択できます StoreSEOをGoogle Search Consoleと統合するこれが重要なのは、Shopify サイトマップを管理して Google などの検索エンジンに送信するには、まずストアを Google Search Console と統合する必要があるためです。
Google Search ConsoleからクライアントID、クライアントシークレット、プロジェクトIDを取得し、StoreSEOアプリに追加するだけです。方法がわからない場合は、 詳細なガイドはこちらをご覧ください ステップバイステップのチュートリアルをご覧ください。

ステップ4: StoreSEOをGoogleに接続する
Google Search Consoleから認証情報を取得したら、StoreSEOダッシュボードに移動して「サイトマップ' タブをクリックします。Googleに接続' ボタンをクリックすると、StoreSEO アプリが Google に接続されます。
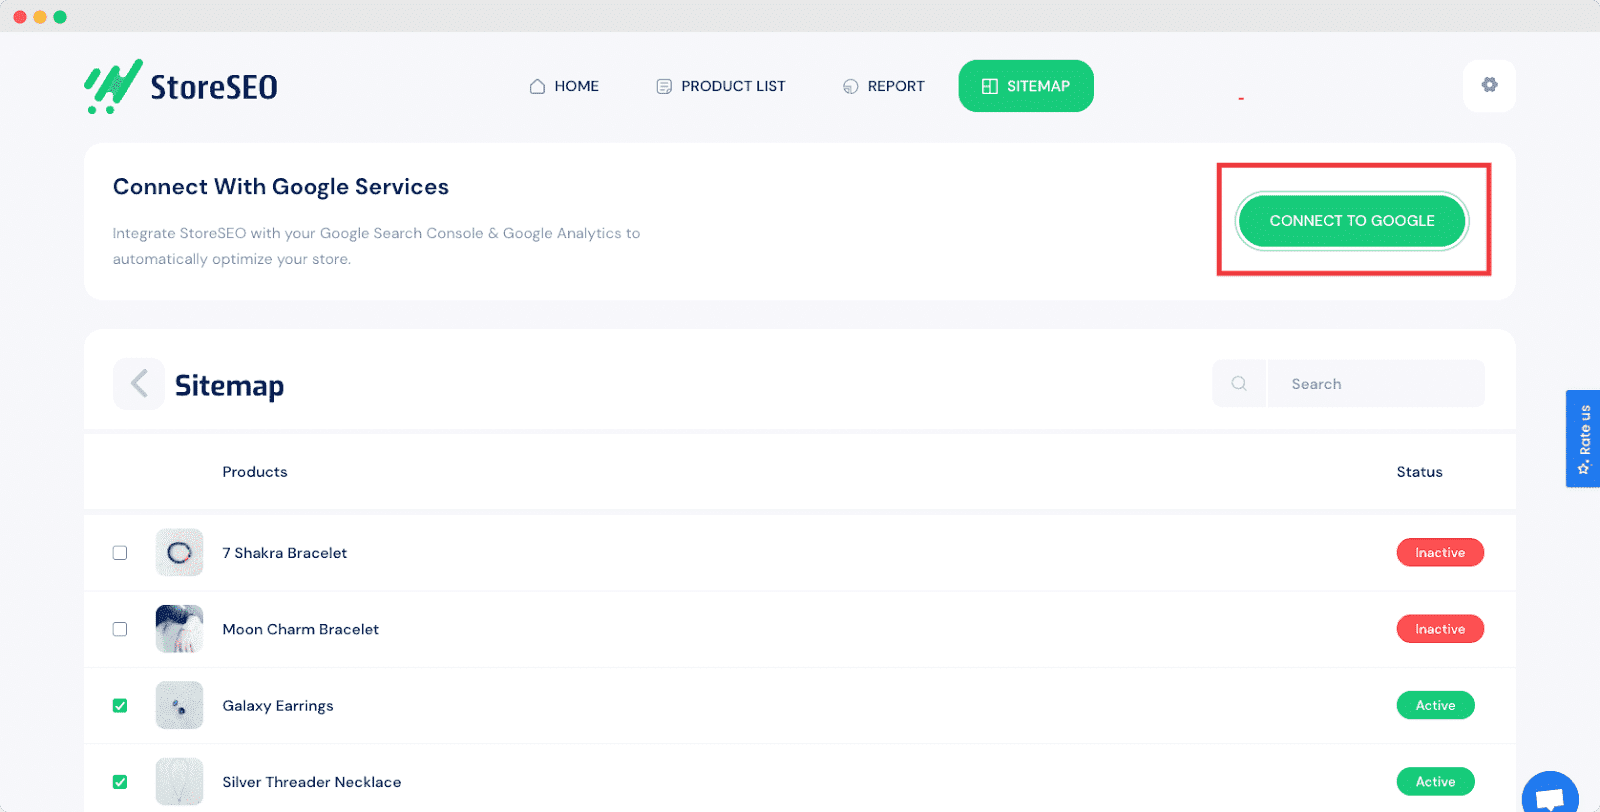
ステップ5: サイトマップを管理してGoogleに送信する
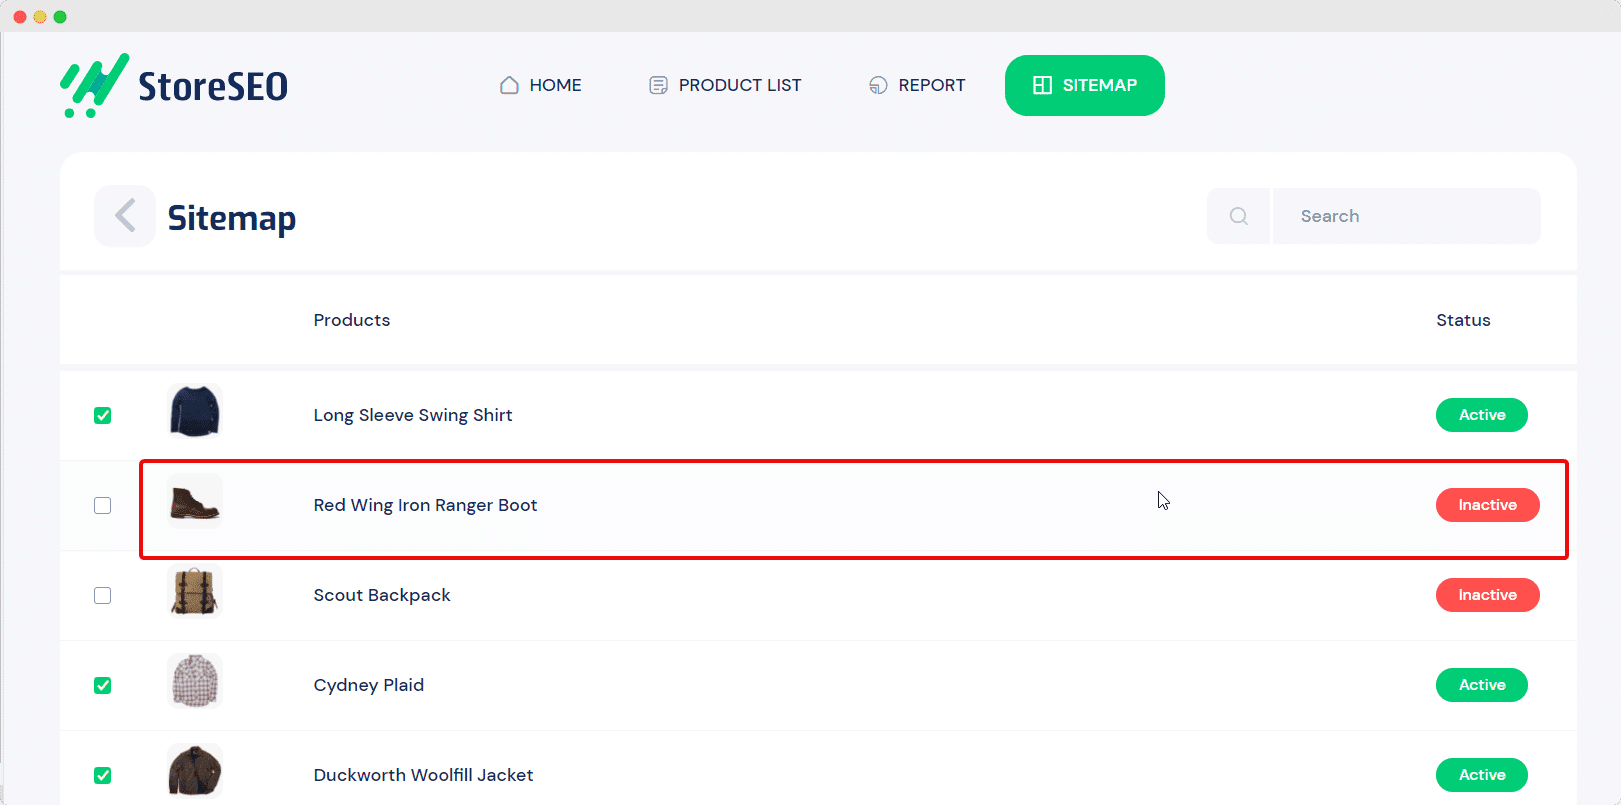
ストアをGoogle Search Consoleに接続すると、 ドメイン名を確認する そしてStoreSEOでShopifyサイトマップを管理します。サイトマップに含めるか除外するかを選択できます。商品がサイトマップに追加されると、 'アクティブ' ステータス。除外すると、 「非アクティブ」 状態。
完了したら、ShopifyサイトマップをGoogleに送信するには、 「Google に送信」 ボタン。
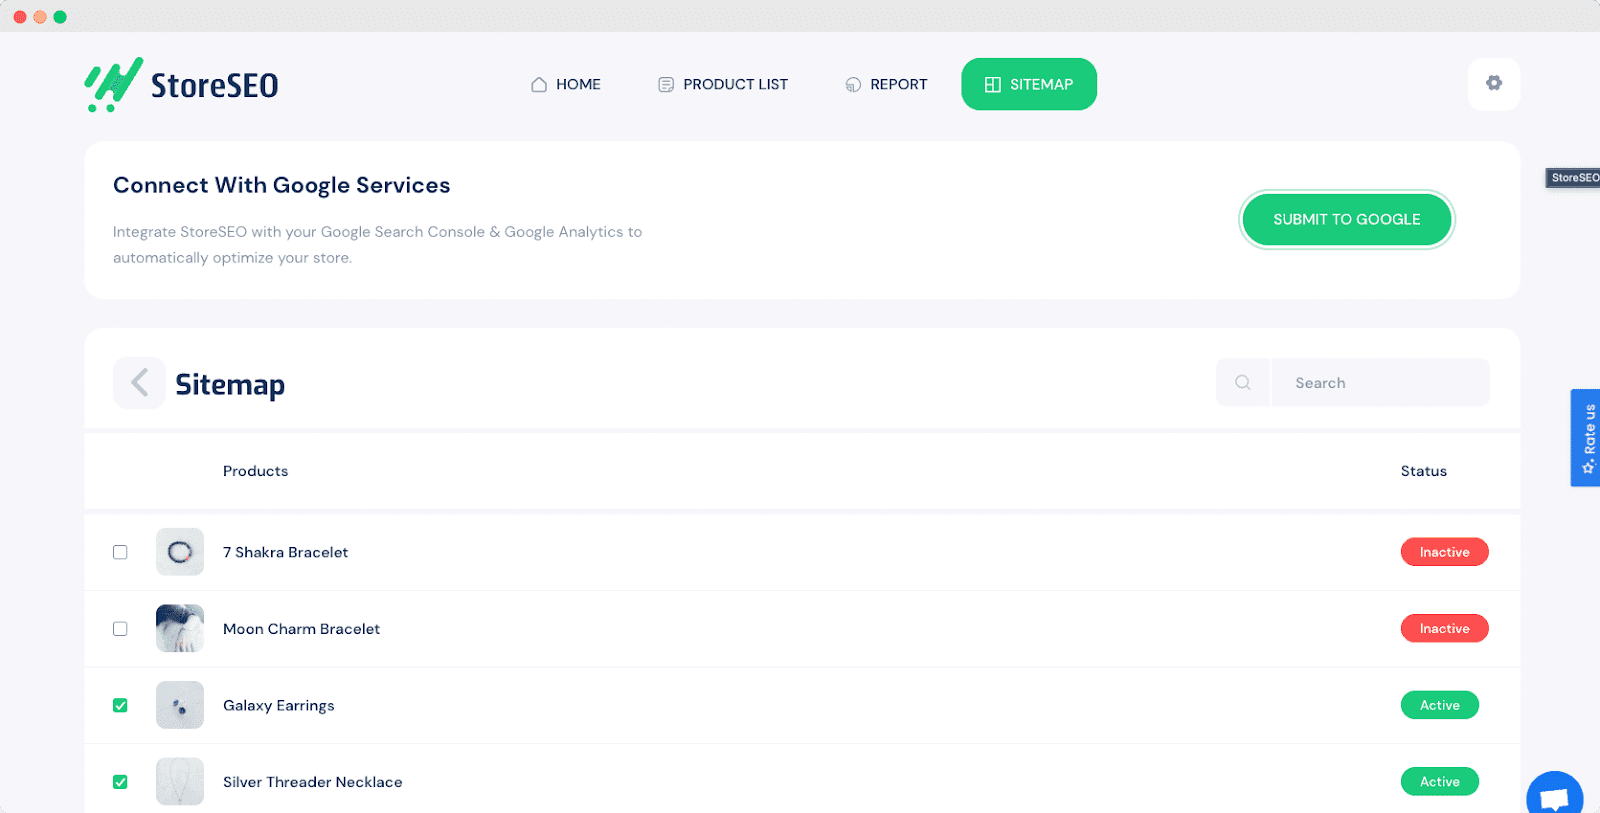
これらの簡単な手順で、 Shopifyのサイトマップを管理する 簡単に、そしてビジネスの検索ランキングの向上に役立ちます。
この投稿を気に入っていただけましたか? ブログを購読する 最新のアップデート、ニュース、チュートリアルなどをご覧ください。


