With StoreSEO, you can easily add alt text to your product images. You can also add alt text to images in the blog posts and pages of your Shopify store website. In this documentation, we will show you how to easily add image alt tag or text to blog posts and pages on Shopify.
Note: The image alt text can help describe the picture of the product to the visitors who are not able to see the product for any reason, such as an image loading error. After you have done your keyword research, you can add suitable keywords in the alt text to increase the chances of ranking your product image in Google search.
How To Add Image Alt Tag Or Text To Blog Posts And Pages? #
First, make sure you have successfully installed the StoreSEO app. Then, follow these step-by-step guidelines to find out how to add alt text for the images of your Shopify blog posts and pages using the StoreSEO app.
Step 1: Add Alt Text To Your Blog’s Featured Image With StoreSEO #
You can directly add the alt text to any blog post’s featured image using StoreSEO. This is very useful if you missed adding the alt text to any featured image when adding the blog post. To do this, open the StoreSEO app and navigate to the ‘Optimize SEO’ option under StoreSEO in the left side panel. Under the ‘Blog Posts’ tab, click on your desired blog.

Now, under the ‘Images’ section, add the alt text for your featured image. Click on the ‘Save’ button in the top right once you are done.

Step 2: Add Image Alt Text When Adding Your Blog Posts & Pages #
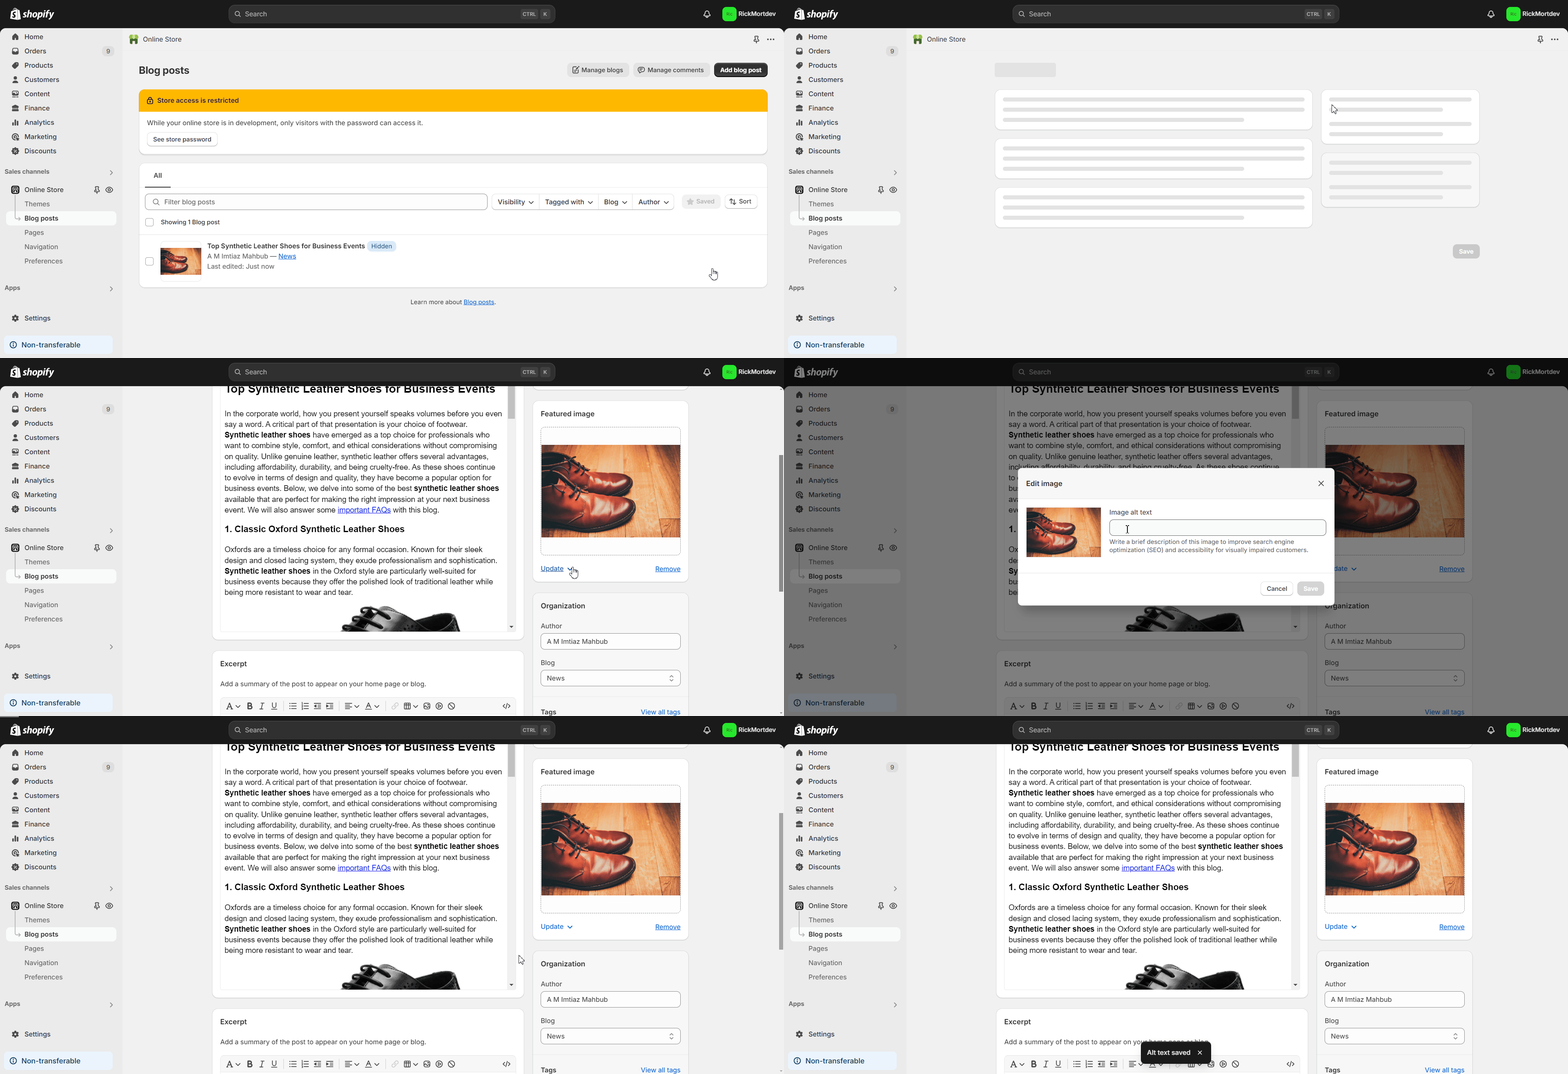
Adding the image alt text with your selected focus keyword is an important component of Shopify blog post and page SEO. Now, we will show you how to add image alt text when adding your blog posts and pages. To add a new blog, navigate to the ‘Online Store’ option under ‘Sales Channels’ on the left side of your Shopify dashboard. Under the ‘Online Store’ option, click on the ‘Blog posts’ button. Next, click on the ‘Add blog post’ button in the top right.
Once you have added the blog post, you will find it in the list in the ‘Blog posts’ option. When adding or editing your blog post, remember to place the suitable alt text for all the images. To add the alt text to the featured image, click on the featured image or select the ‘Edit image’ option under ‘Update’ on the right side. Paste your copied alt text or write it in the designated field and click on the ‘Save’ button.

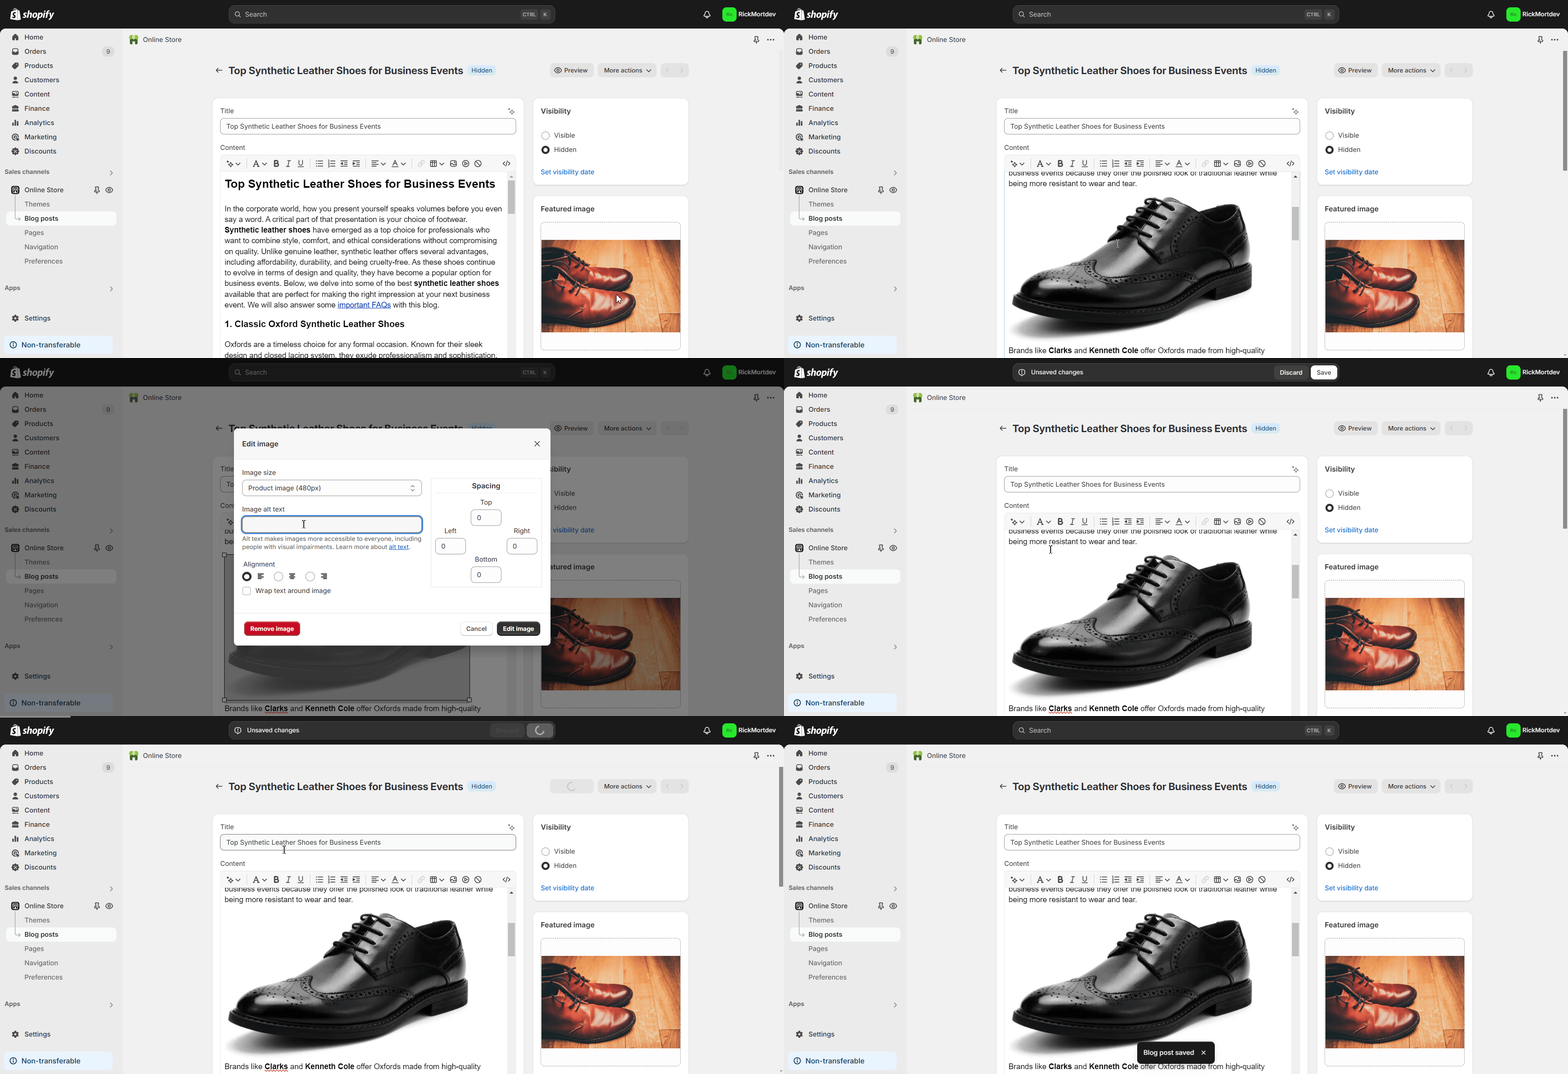
To add the alt text to any internal image, double-click on any image inside the ‘Content’ section. Then, add the alt text and click on the ‘Edit image’ button. Click on the ‘Save’ button to save all the changes.

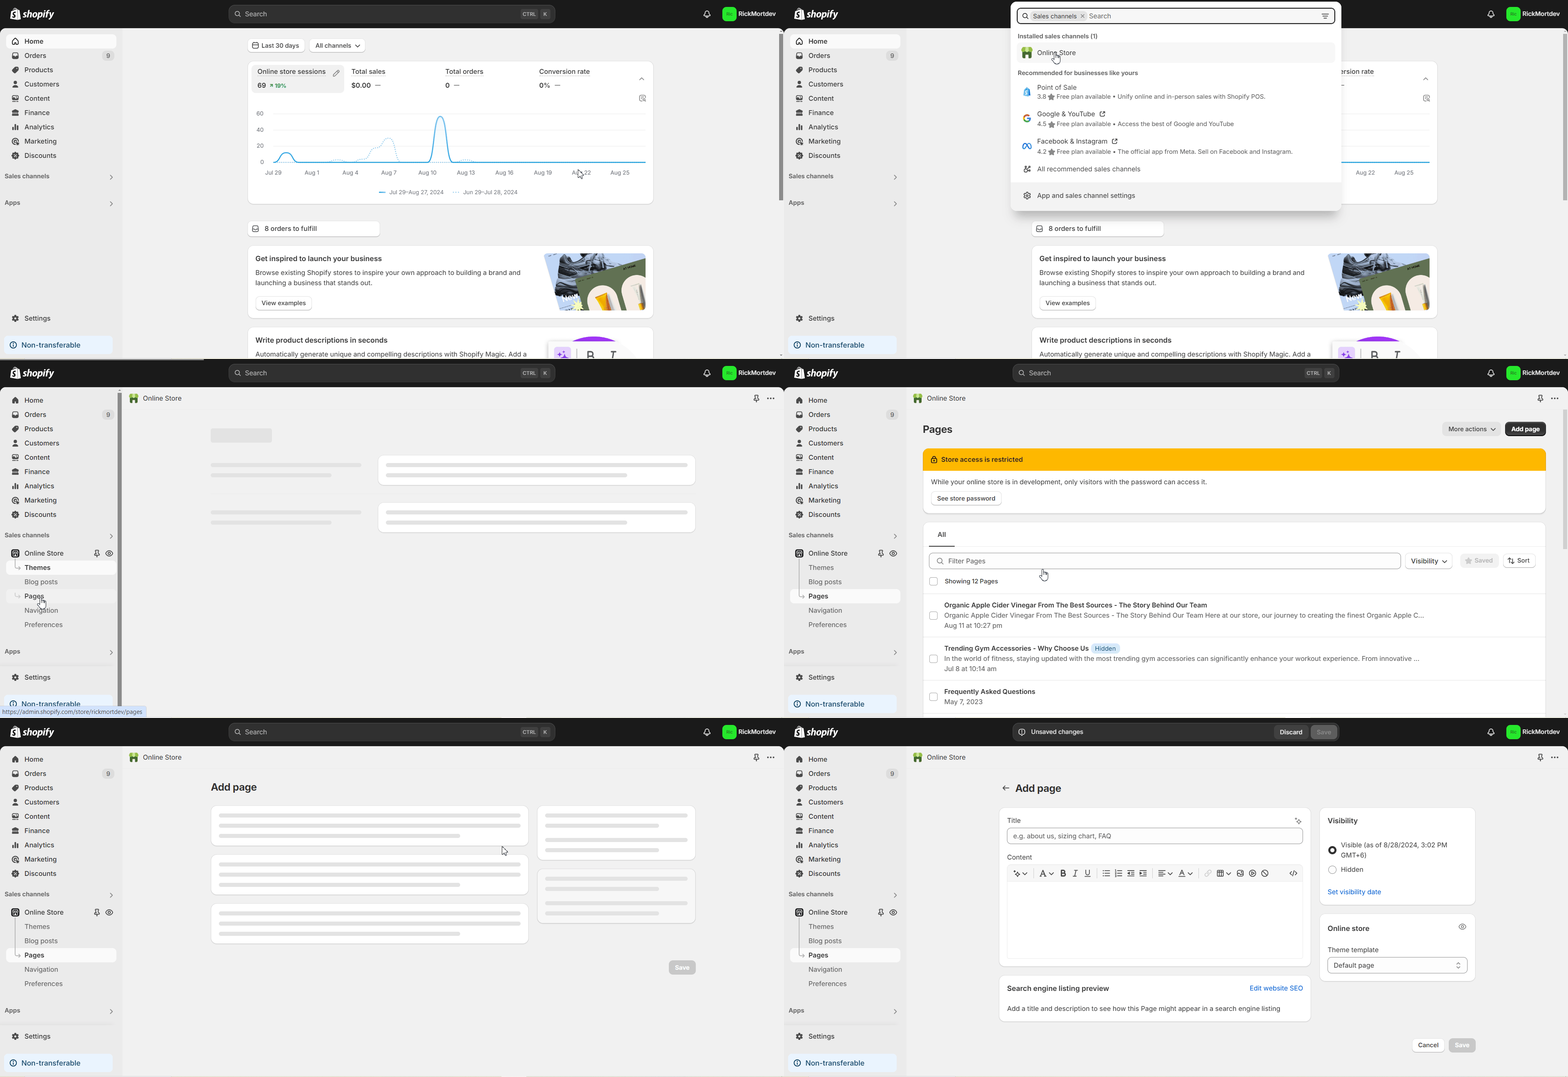
To add a new page, navigate to the ‘Online Store’ option under ‘Sales Channels’ on the left side of your Shopify dashboard. Under the ‘Online Store’ option, click on the ‘Pages’ button. Next, click on the ‘Add page’ button in the top right.

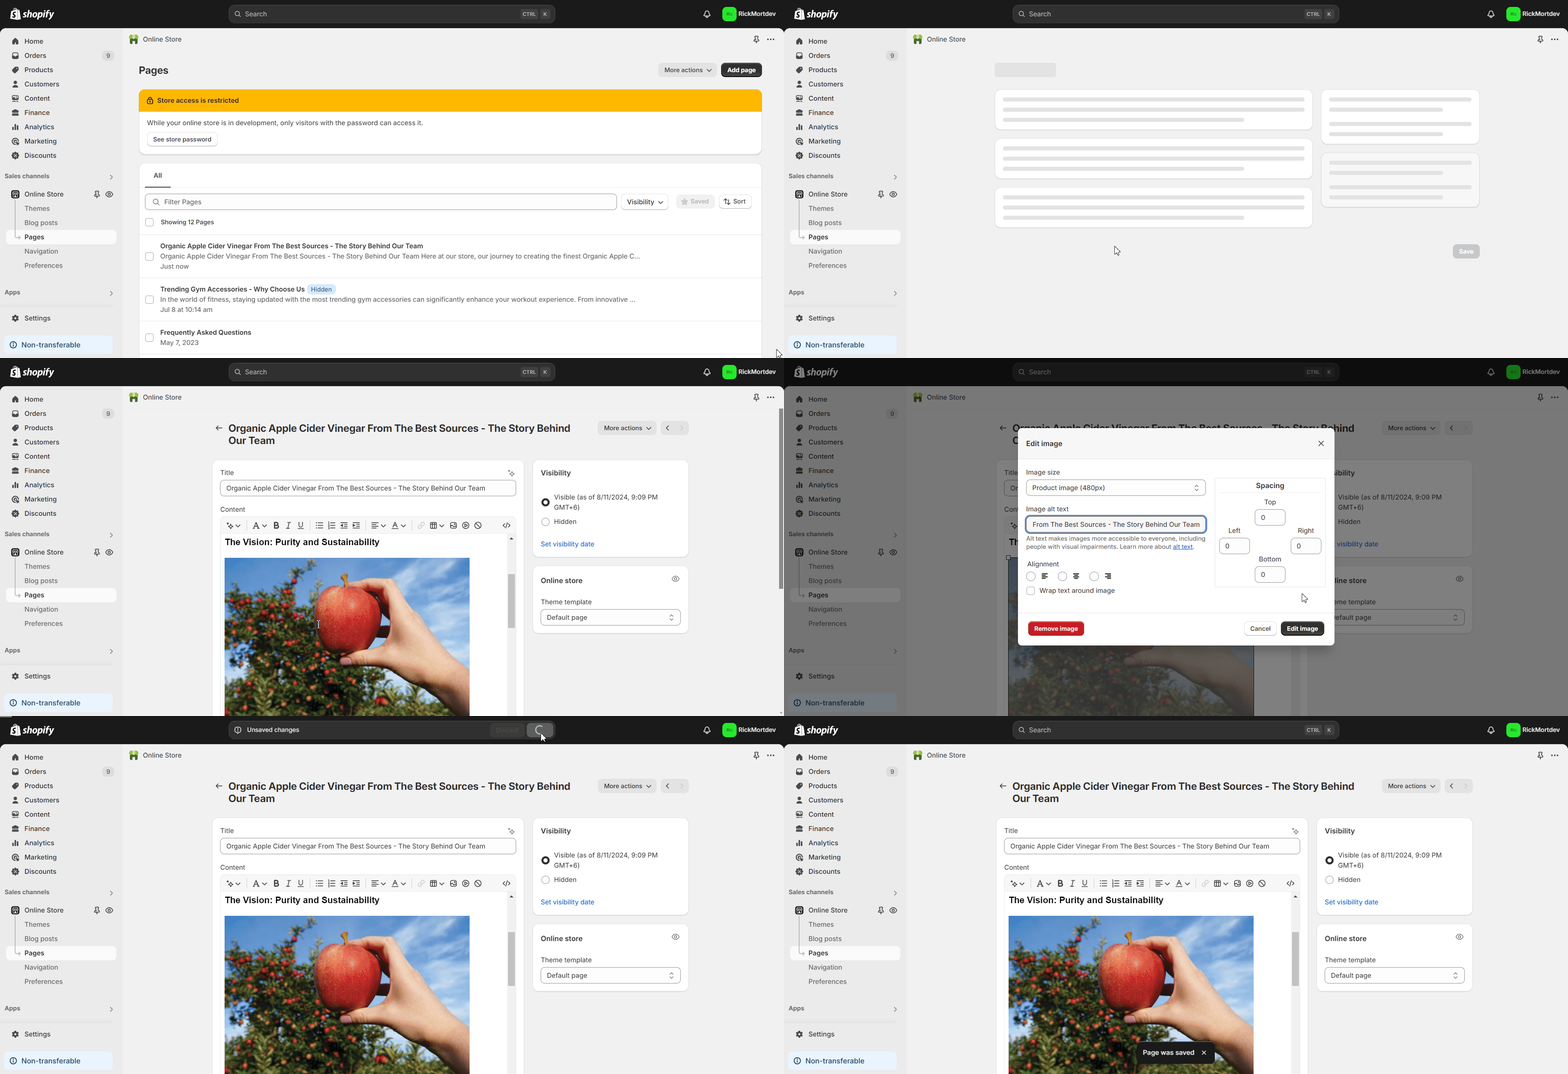
Once you have added the page, you will find it in the list in the ‘Pages’ option. When adding or editing your page, remember to place the suitable alt text for all the images. To add the alt text to any image, double-click on any image inside the ‘Content’ section. Then, add the alt text and click on the ‘Edit image’ button. Click on the ‘Save’ button to save all the changes.

This is how easily you can add image alt tags or text to blog posts and pages on Shopify. Need assistance? Feel free to reach out to our dedicated support team with any type of query.


